
")


This guide is your roadmap for building a production-ready Android app from the ground up. We’re going to dive deep into everything that matters: setting up your environment, crafting a modern architecture with Kotlin, designing a clean UI with Jetpack Compose, and even navigating the complexities of testing, security, and monetization for the U.S. market.
Setting Up Your Development Environment
Before you write a single line of code, getting your development environment right is non-negotiable. Think of it as building a solid foundation. A proper setup saves you from countless hours of headaches later and is the first real step in turning your app idea into a reality.
Installing and Configuring Android Studio
Your command center for this entire process is Android Studio, the official IDE from Google. Grab the latest version from the official Android Developer website and run the installer. It’s pretty straightforward, but the real work starts once you launch it for the first time.
Android Studio will prompt you to set up the Android SDK (Software Development Kit), which is the collection of tools and libraries essential for building, testing, and debugging your app. Unless you have a very specific reason not to, stick with the "Standard" setup. This ensures you get the latest stable Android API level, which you'll need to access modern features.
A common trap for newcomers is getting lost in SDK management. My advice? Let Android Studio's SDK Manager handle it. Always build against the stable API versions for production apps to maximize device compatibility and steer clear of bugs found in preview releases.
Creating Your First Virtual Device
With your SDK ready, you need a place to actually run and test your app. This is where the AVD (Android Virtual Device) Manager comes in. You can access it right inside Android Studio to create emulators that mimic real-world Android phones and tablets.
For your first AVD, I recommend choosing a recent Google Pixel device profile and the latest stable system image (like the current Android API). This gives you a high-fidelity testing environment that’s a close match to what many of your users will have in their hands.
The whole setup process really boils down to three key phases.

As you can see, it's a logical flow: get the tools, configure them correctly, and only then start coding.
The Critical Choice: Native vs. Cross-Platform
One of the biggest decisions you'll make right at the start is which tech stack to use. This choice has long-term consequences, so it's important to understand the landscape.
For this guide, we're going all-in on native Kotlin development. Why? Because it’s the gold standard for building high-quality, performant, and deeply integrated Android apps. It's what Google champions, with over 60% of professional Android developers now using it. Given that Android holds a massive 72.55% of the global mobile OS market, mastering the native platform is a smart move.
To help you see the bigger picture, here's a quick comparison of the two main development paths.
Choosing Your Development Path: Kotlin Native vs. Cross-Platform
| Factor | Native Kotlin | Cross-Platform (e.g., Flutter, React Native) |
|---|---|---|
| Performance | Highest possible performance and responsiveness. Direct access to native APIs. | Good, but often a step behind native. May have performance overhead due to the abstraction layer. |
| UI/UX | Complete control for a pixel-perfect, platform-specific user experience. | UI is often generic across platforms, which can feel slightly "off" to users. |
| Device Features | Immediate access to the latest OS features and hardware (cameras, sensors, etc.). | Access to new features can be delayed, waiting for the framework to add support. |
| Development Speed | Slower initial build as you're creating a dedicated Android codebase. | Faster initial development since one codebase targets both Android and iOS. |
| Long-Term Cost | Potentially higher upfront cost if building for both platforms separately. | Often lower upfront cost, but can become complex and expensive to maintain. |
| Team Skills | Requires specialized Android development expertise. | Allows teams with web backgrounds (React Native) or Dart skills (Flutter) to build mobile apps. |
Ultimately, while cross-platform tools have their place, nothing beats native for an app that needs to feel truly at home on Android. For a more detailed breakdown, you can explore our guide on choosing the right tech stack for your USA-based mobile app development project.
Your First Project: "Hello, World!"
Alright, with the environment set up and the big decisions made, it's time to fire up your first project.
Inside Android Studio, go to "New Project" and pick the "Empty Views Activity" template. This gives you a clean, minimal starting point without any unnecessary boilerplate. Give your application a name, make sure Kotlin is selected as the language, and let the IDE work its magic.
The project structure might look a bit intimidating at first. Just focus on these two folders for now:
app > java > com.example.yourapp: This is where all your Kotlin code will live.app > res > layout: This is where you'll define your app's UI screens.
Also, keep an eye on the build.gradle file; it's the control panel for your project's dependencies and settings.
Now for the moment of truth. Click the green "Run" arrow in the toolbar. Android Studio will build your app and launch it on the emulator you created. Seeing that "Hello, World!" message pop up on the screen is your confirmation that everything is configured perfectly and you're ready to start building for real.
Designing Your App Architecture and UI

Alright, your development environment is set. Now for the fun part: deciding how your app will actually be built. This is where architecture comes in, and getting it right from the start will save you countless headaches down the road.
A solid architecture is like a good blueprint for a house. It ensures everything has its place, making your app scalable, easy to maintain, and, most importantly, testable. It’s all about separating concerns so you don't end up with a tangled mess of code that's impossible to debug.
For modern Android development, the choice is clear: Model-View-ViewModel (MVVM) is the standard, and for good reason. It cleanly separates your app into three distinct, interconnected parts.
What Is MVVM, Really?
MVVM is more than just another acronym; it's a practical approach to organizing your code that genuinely makes development easier.
- Model: This is all about your data and business logic. Think of it as the brain that fetches information from a database or an API. The key here is that the Model has no idea what the UI looks like—and it shouldn't.
- View: This is what your user sees and interacts with. In our case, this will be our UI screens built with Jetpack Compose. The View's only jobs are to display data and tell the ViewModel when a user does something, like tapping a button.
- ViewModel: This is the bridge between the Model and the View. It holds the UI's state (the data it needs to display) and provides it to the View. When the user interacts with the UI, the ViewModel processes that action, updates its data, and the View automatically updates to match.
This structure creates a predictable, one-way flow of data that is much simpler to follow and manage.
The secret sauce of MVVM is that it makes your app's state lifecycle-aware. Your
ViewModelcan survive things like screen rotations that would normally destroy your UI, which means no more frustrating data loss for your users.
Building a Modern UI with Jetpack Compose
If you've been around Android development for a while, you remember the days of clunky XML layouts. Those days are over. Jetpack Compose is Google's modern, declarative UI toolkit that has fundamentally changed how we build user interfaces.
Instead of writing step-by-step instructions on how to draw the UI, you just describe what the UI should look like based on its current state.
For instance, putting some text on the screen is now as simple as calling a function:
import androidx.compose.material3.Text
import androidx.compose.runtime.Composable
@Composable
fun Greeting(name: String) {
Text(text = "Hello, $name!")
}
This isn't just about writing less code. This declarative style is more intuitive, making your UI logic easier to read and reason about. Building complex lists, adding animations, and creating custom designs is now a much more fluid and efficient process. You can dive deeper into how UI and UX design elevate mobile app development in the USA in our dedicated article.
Fetching Data and Managing State
A pretty UI is great, but apps need to do things—fetch data, handle input, and react to changes. This is where MVVM, combined with a few other modern libraries, really proves its worth.
Let's walk through a common scenario: fetching a list of items from an API.
- Networking with Retrofit: For making network requests, Retrofit is the undisputed champion in the Android world. It lets you define your API endpoints in a simple Kotlin interface, keeping your networking code clean and organized.
- Asynchronous Operations with Coroutines: You can't make a network call on the main UI thread without freezing your app. Kotlin Coroutines are the modern solution for handling these background tasks without descending into the callback hell of the past.
- State Management in the ViewModel: The ViewModel orchestrates the whole process. It uses Coroutines to call your Retrofit service and fetch data. This data is then exposed to the UI using state holders like
StateFloworMutableState. - Observing State in the UI: Your Jetpack Compose UI simply "collects" this state from the ViewModel. The magic of Compose is that whenever the data in the ViewModel changes, it automatically and efficiently redraws only the parts of the screen that need updating.
This modern stack isn't just for startups building the next social media app. Enterprise adoption of mobile has exploded, with the market for enterprise mobile applications projected to hit an incredible $338.42 billion by 2031. This surge is fueled by bring-your-own-device (BYOD) policies, with over 80% of enterprises now supporting personal devices for work.
This shift has created a massive demand for developers who can build secure, high-performance native Android apps. Companies need robust corporate tools, and native development remains the best way to deliver the performance and deep device integration they require.
Implementing a Modern Testing Strategy

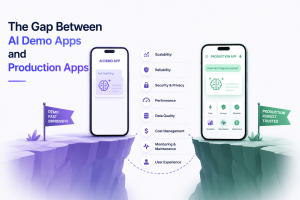
An app with a slick UI and cool features is pretty useless if it’s riddled with bugs. What really separates a professional product from a hobby project is reliability, and that comes from a solid foundation of testing. Just tapping through your app for a few minutes before a release isn't a strategy; it's a gamble.
To build with confidence, you need a structured approach. The tried-and-true model for this is the testing pyramid. It's a simple concept: imagine a pyramid with a wide base, a smaller middle section, and a tiny top. This visual gives you the ideal ratio for the different kinds of tests you should be writing.
- Unit Tests (The Base): This is where you'll spend most of your time. These tests are small, incredibly fast, and focus on individual functions or classes in complete isolation. They make up the bulk of your test suite.
- Integration Tests (The Middle): These check that different components of your app play nicely together. Think of testing how your ViewModel interacts with a data repository—that's a classic integration test.
- UI Tests (The Top): At the very peak are UI tests. They are the slowest and most fragile, as they automate user interactions on a real or virtual device to confirm the entire system works end-to-end.
Following this structure helps you catch the vast majority of bugs quickly and cheaply at the unit level. You save the slow, expensive UI tests for only the most critical user flows.
Writing Effective Unit Tests
The heart and soul of your testing strategy is your unit tests. For an Android app, this is where you prove your business logic is sound. Your go-to tools for this are JUnit, the standard testing framework for Java and Kotlin, and a mocking library like Mockito.
So, why do you need "mocks"? Let’s say your ViewModel depends on a repository to fetch user data. In a unit test, you don't want to make an actual network call. You just want to confirm that the ViewModel behaves correctly when the repository returns certain data. Mockito lets you create a fake repository that you can control completely.
You can program your mock to say, "When the getUser() function is called, return this exact user object." This lets you test your ViewModel's logic in a perfectly predictable environment, checking if it updates its state correctly without any messy external dependencies.
A common mistake I see is developers trying to test too much in a single unit test. A good unit test is small, fast, and focuses on one specific behavior. If you find yourself writing a ton of complex setup code, you're probably trying to test more than one "unit."
Verifying the User Interface with Espresso
While unit tests are great for your underlying logic, they can't tell you if a button is actually visible on the screen or if it responds when a user taps it. That’s a job for UI tests, and the standard framework on Android is Espresso. It provides a simple API to write tests that simulate user interactions and then verify the state of your UI elements.
A typical Espresso test follows a simple pattern:
- Find a view on the screen (e.g., a button with specific text).
- Perform an action on it (like a
click()ortypeText()). - Check, or "assert," that another view on the screen has changed as you expected.
These tests run on an actual device or emulator, giving you that final, crucial check that your user flows aren't broken. But remember, they are slow. Reserve them for your absolute must-work paths, like the login sequence or the checkout process.
Automating Everything with CI/CD
Writing all these tests is only half the battle. To really get the benefit, you need to run them automatically every single time you make a change. This is where Continuous Integration/Continuous Deployment (CI/CD) comes in. For most developers, GitHub Actions is the simplest and most powerful way to get started.
CI/CD is just the practice of automating your build, test, and release pipeline. With GitHub Actions, you create a simple workflow file (written in YAML) that lives right inside your repository. You can configure this workflow to trigger automatically every time code is pushed to your main branch.
Here’s what a typical CI workflow does:
- Checks out your latest code onto a fresh virtual machine.
- Sets up the necessary Java and Android SDK environment.
- Runs all your unit and UI tests automatically.
- Builds and signs a release-ready Android App Bundle (AAB).
If a single test fails, the entire build fails, and you get notified immediately. This creates an incredible safety net, stopping bugs in their tracks before they ever have a chance to reach your users. Setting up this automation early is one of the most impactful things you can do to boost your code quality and development speed.
Optimizing App Performance and Security
Alright, so you've built an app that works. The features are there, the tests are passing, and you're feeling pretty good. But the job isn't done yet. In fact, one of the most critical phases is just beginning: refinement. This is where we transform a functional app into one that feels great to use and that people can trust.
We’re talking about performance tuning and security hardening. Think of these as non-negotiable pillars for success. If your app is slow, buggy, or leaks data, it won't matter how great the features are. Users will uninstall it in a heartbeat.
A sluggish app feels broken. Period. Slow startup, stuttering animations, or a battery that drains way too fast are silent killers. On the flip side, a single security breach can vaporize your reputation overnight. So, let’s get into the practical, hands-on techniques to make your app fast, efficient, and secure.
Hunting Down Performance Bottlenecks
Your first and best friend in this process is the Android Studio Profiler. This isn't just a tool; it's your app's diagnostic dashboard. It gives you a real-time look at CPU, memory, network, and energy usage. It’s like hooking your app up to an EKG to see exactly what’s happening under the hood.
A massive performance hog I see all the time is sloppy memory management, especially memory leaks. This happens when your app clings to objects it doesn't need anymore, stopping the garbage collector from doing its job. Over time, this eats up memory, causing slowdowns and, eventually, crashes.
The Memory Profiler is your weapon here. It lets you visualize exactly what's being allocated and helps you spot objects that are sticking around when they shouldn't. By taking a couple of heap dumps and comparing them, you can pinpoint the source of a leak and squash it for good.
Don't treat performance as a "we'll fix it later" problem. Profile your app early and often, especially right after you add a new feature. It's infinitely easier to fix a small issue when it appears than to untangle a mess of performance problems just before you need to ship.
Another area to obsess over is app startup time. Users have zero patience for slow-loading apps. The Profiler helps you break down your startup sequence to see what's taking so long. A few quick wins here usually involve:
- Lazy Initialization: Don't load every single library and object in your
Applicationclass. If you don't need it right away, initialize it later. - Splash Screens: Use a simple theme-based splash screen. It provides instant visual feedback while the real work happens on a background thread.
Finally, keep a close eye on the Energy Profiler. Things like holding wakelocks for too long or making a bunch of tiny network requests are notorious battery killers. A user whose battery dies because of your app is not going to leave you a five-star review.
Hardening Your App's Security
Building a secure app is all about layers. Your goal is to make it as difficult as possible for bad actors to get at your users' data or your own trade secrets. No app is an impenetrable fortress, but by following some well-known best practices, you can make your app a much, much harder target.
One of the biggest, most common mistakes is hardcoding API keys or other secrets right into your app's source code. I can't stress this enough: don't do it. It’s trivial for someone to decompile your APK and pull those keys right out.
The right way to handle this is with the Android Keystore system. It lets you store cryptographic keys in a secure hardware-backed container, making them incredibly difficult to extract. Store your API keys on a secure backend and use the Keystore to manage the credentials your app needs to talk to it. For a deeper dive, check out our guide on ensuring app security best practices for USA app developers.
Next up is code obfuscation. When you build a release APK, tools like R8 (which is on by default) will go through your code and rename your classes, methods, and variables to short, nonsensical names. This turns your compiled code into a nightmare for anyone trying to reverse-engineer it, protecting your business logic.
Lastly, you absolutely must secure your network traffic. Every single piece of data sent between your app and your server needs to be encrypted with HTTPS. To take it a step further, look into certificate pinning. This technique hardcodes the server's SSL certificate into your app, ensuring it only talks to your server. It’s a powerful defense against man-in-the-middle attacks, especially on sketchy public Wi-Fi.
Getting Your App on the Google Play Store
You've poured countless hours into building, testing, and polishing your app. Now comes the exciting part: getting it into the hands of users. The final frontier is the Google Play Store, and a successful launch here is less about a single "publish" button and more about a well-executed strategy.
Your mission control for this entire process is the Google Play Console. The first thing you'll do is set up a developer account, which requires a one-time $25 registration fee. After they verify your identity, you’re in. This dashboard is where the magic happens, from uploading your app to tracking its performance post-launch.
From Code to Android App Bundle
Before you can even think about your store listing, you need to package your app for release. The gold standard for this is the Android App Bundle (AAB). If you're still thinking in terms of APKs, it's time to make the switch.
Think of an AAB as a master blueprint of your app. It contains all your compiled code and resources, but the clever part is what happens next. You upload this single AAB file, and Google Play takes over, dynamically building and serving optimized APKs for each user's specific device. This means a user with a low-res screen won't download your ultra-high-res assets. The result? Smaller app sizes, faster downloads, and happier users from the get-go.
From personal experience, moving to AABs was a game-changer. It completely eliminated the nightmare of manually building and managing dozens of APK variants for different screen densities or CPU architectures. It's one of those "set it and forget it" features that saves you a ton of headaches.
Creating a Store Listing That Converts
Your store listing is your app's front door, your digital billboard, and your lead salesperson all rolled into one. A fantastic app can easily get lost in the noise with a weak listing, so don't treat this as an afterthought.
Every element needs to be carefully considered:
- App Title & Short Description: This is prime real estate for discovery. Your title needs to be memorable, and your short description is your one-sentence pitch to hook a potential user scrolling through search results.
- Full Description: Here’s where you sell the dream. Go beyond just listing features; explain the benefits. How does your app solve a problem or make someone's life better? Use bullet points and short paragraphs to keep it scannable.
- Graphics Are Everything: Humans are visual creatures. You'll need a stunning, high-resolution app icon that looks good small and large. Your screenshots aren't just pictures; they should tell a story, guiding a user through the best parts of your app. Don't forget the feature graphic—it's often the first visual people see.
The Final Hurdles: Compliance and Pre-Launch Testing
Before hitting that "publish" button, there are a few critical, non-negotiable steps to clear. This is all about building trust with users and staying on the right side of Google's policies.
First, you absolutely must have a privacy policy. This is a legal requirement, not a suggestion. Your policy needs to be hosted on a public URL and clearly explain what data your app collects and how you handle it.
Next up is the Data safety section within the Play Console. This is a comprehensive questionnaire where you declare all your data handling practices. Be thorough and honest. Google uses this to create a standardized summary that users see on your listing, and any discrepancies can get you in hot water.
Finally, a pro never launches an app cold. You need to use the built-in testing tracks to iron out the kinks.
- Internal Testing: Start with a tiny group of trusted testers (like your own team) for a quick sanity check.
- Closed Testing: Expand to a larger, invitation-only group. This is great for catching device-specific bugs you couldn't find on your own hardware.
- Open Testing (Beta): Let the public in! Users can opt-in to your beta version right from the store listing. This is your final, real-world stress test before the big day.
Working your way through these testing tracks is the single best way to ensure your launch is smooth and successful, not a frantic bug-fixing marathon.
To help you get organized, here’s a quick checklist of the key assets and information you'll need to gather before you're ready to submit.
Google Play Store Submission Checklist
This table summarizes the essential assets and information required before you can publish your Android app, ensuring a smooth submission process.
| Item | Description | Status |
|---|---|---|
| Developer Account | An active and verified Google Play Developer account. | ☐ Complete |
| Signed AAB | Your release-ready, signed Android App Bundle file. | ☐ Complete |
| App Title | The official name of your app (max 30 characters). | ☐ Complete |
| Short Description | A brief, catchy summary (max 80 characters). | ☐ Complete |
| Full Description | A detailed explanation of your app's features and benefits (max 4000 characters). | ☐ Complete |
| High-Res Icon | 512×512 pixel app icon in 32-bit PNG format. | ☐ Complete |
| Feature Graphic | 1024×500 pixel JPG or 24-bit PNG. | ☐ Complete |
| Screenshots | At least 2 high-quality screenshots (phone, tablet, Wear OS, etc.). | ☐ Complete |
| Privacy Policy URL | A publicly accessible link to your app's privacy policy. | ☐ Complete |
| Data Safety Form | The completed data safety questionnaire in the Play Console. | ☐ Complete |
| App Category | The selected category and tags for your app. | ☐ Complete |
| Contact Details | A support email address for users. | ☐ Complete |
Having all these items checked off before you begin the submission process in the Play Console will save you a lot of time and prevent last-minute scrambling.
Monetization and Post-Launch Growth

Getting your app live on the Google Play Store is a huge win. But the truth is, launch day is just the starting line. Now comes the real work: turning that app into a sustainable business.
For any app to have staying power, especially in the crowded U.S. market, your post-launch strategy is everything. This means figuring out how you’ll make money, stay compliant with regulations, and make sure your app is usable for everyone.
The first, and maybe most important, question is how you’ll generate revenue. Your monetization strategy needs to feel like an organic part of your app, not a clunky afterthought. Getting this wrong can quickly drive away the very users you just worked so hard to acquire.
Choosing Your Monetization Model
There’s no magic bullet for monetization. The right model for your app comes down to its core function and who your users are. You have to match your revenue strategy to the value you're offering. Forcing a subscription model on an app that doesn't provide continuous, evolving content is a recipe for failure.
Here are the models I see work most consistently on Android:
- In-App Purchases (IAP): This is perfect for selling one-off digital items. Think extra lives in a game, a pack of premium photo filters, or a special feature unlock. It works because it offers immediate, tangible value.
- Subscriptions: If your app provides ongoing value—like a streaming service, a regularly updated content library, or powerful productivity tools—subscriptions are your best bet. They create a reliable, predictable revenue stream, but they also create an obligation to keep delivering new features and content.
- Advertising: A fantastic option for free apps that can attract a large, engaged audience. With a platform like Google’s AdMob, integration is pretty straightforward. You can earn revenue by showing ads without ever having to charge your users a dime.
A hybrid model is often the sweet spot. You could, for instance, offer a free version of your app supported by ads, with an optional subscription that removes them and unlocks pro-level features. This gives users a choice and widens your revenue net.
Navigating U.S. Market Compliance
The moment your app starts collecting user data or making money, you’re playing in a different league with serious legal responsibilities. Data privacy in the U.S. is a big deal, and pleading ignorance won’t get you very far if you mess up.
You absolutely need to be familiar with the California Consumer Privacy Act (CCPA). It doesn’t matter where your company is based; if Californians can download and use your app, you have to comply. The CCPA grants users rights, like knowing what personal data you’re collecting and requesting its deletion. This means having a crystal-clear privacy policy and transparent data practices is non-negotiable.
On top of that, accessibility isn't just a nice-to-have feature—it can be a legal requirement. Designing your app to be usable by people with disabilities is the right thing to do, but it also dramatically expands your potential user base and shows a real commitment to inclusivity.
Thinking through these things takes your work beyond a simple android app development tutorial and turns it into a real business plan. By planning your monetization, staying on top of compliance, and building an accessible app from the start, you’re not just launching—you’re setting yourself up for long-term growth.
Ready to build an app that succeeds in the competitive U.S. market? The experts at Mobile App Development provide the insights and guidance needed to turn your vision into reality. Get in touch today to discuss your project.


Add Comment